Share a file or folder with a Guest User:
1. Use your web browser to visit https://yoursitename.sharepoint.com/ and locate the file or folder to share. NOTE: If you share a folder, you can continue to put files in that folder, and the recipient will be able to see them without you having to go through this process for every file you want to share to the same recipient.
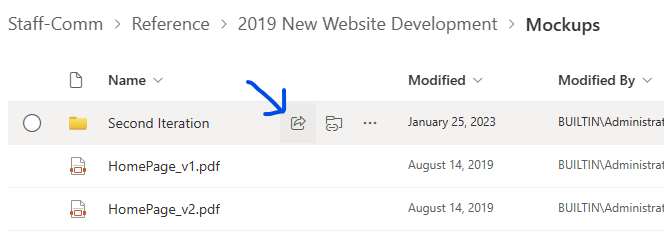
2. Hover over the file or folder to share, click the share icon:

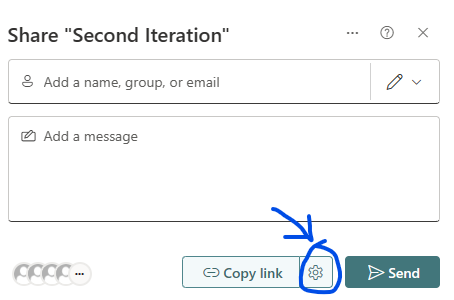
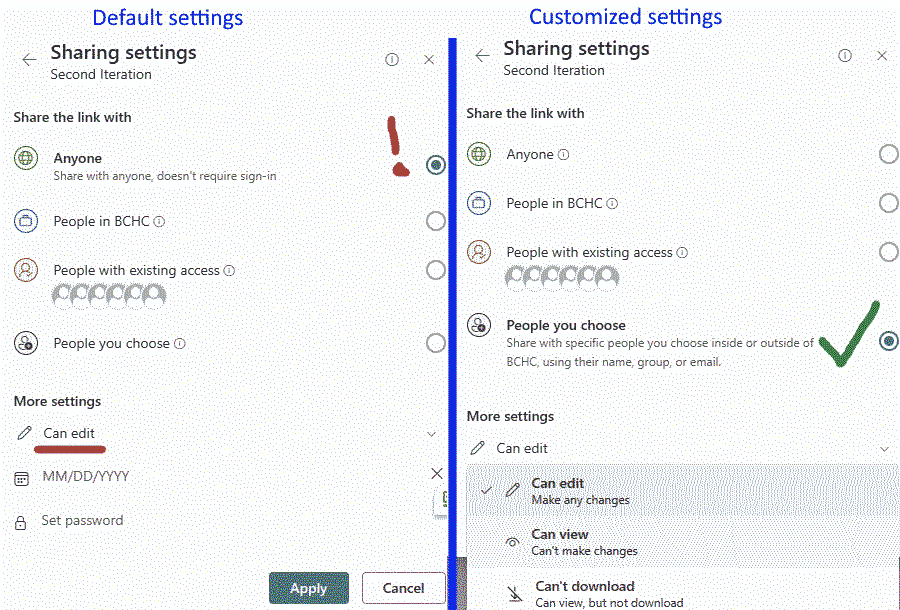
3. IMPORTANT: adjust the sharing setting BEFORE adding a user or Guest User:

4. The dialog window will expand, showing “Anyone can edit” as default, and this must be changed. We’re just trying to share with ONE specific person, and then only to view (unless the NEED to modify files without your knowledge or further permission). Choose the most restrictive permission (lowest on the list) that will still allow the task to be performed.

5. Then click “Apply” button
6. Now enter the target contact/Guest User (start typing name and chose from the drop down list that appears), then
a. Click “Send” button, or
b. Click the “Copy link” button, and paste that link in a personalized email to them using Outlook or however you usually send emails. There is a smaller chance of it going to spam and provides better context – so they know it’s real, and not train people to click random links in emails.
Invite a Guest User
It may be required, if the organization settings dictate, to add an external user as a “Guest User” before being able to share to them. If you don’t have access to invite guest users, ask your organization admin.
1. Go to https://admin.microsoft.com/Adminportal/Home?#/GuestUsers
2. Click on “Add a guest user”.
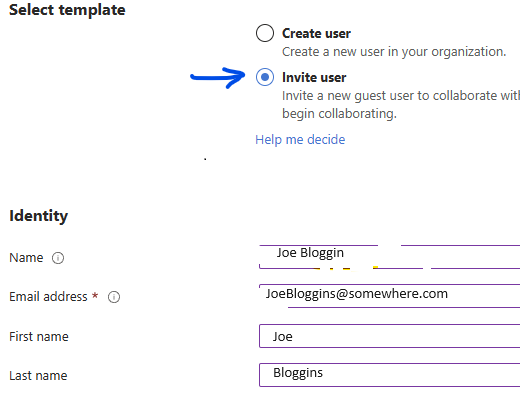
3. Select “Invite user”, fill out form below (only email is necessary, however providing the other fields will make it easier to manage afterward).

4. Leave “Groups and roles” default/blank, as we’ll assign them only specific items in the next section.
5. Click “Invite” button.
Note: You may get left in an Azure or Entra page, which is confusing and unrelated to this action, so you can close that tab, and go back to step #1 to see the list of Guest Users. (hopefully with the new person you added, but there may be a delay).