When you need a file from someone, there are any number of ways to get it. A common one is through email, sending the file as an attachment. But email is notoriously insecure, and has a realistic file size limit of 20MB with most mail providers.
Instead, you can request someone upload files directly to your OneDrive. They’ll still get an email, but instead of an attachment, they’ll get a link where they can upload their files. They can’t see your other files, and each file they upload will be tagged with their initials.
Note: Requesting files is different from sharing a OneDrive folder. Sharing folders means sharing privileges; you’re not only giving people access to your other files, you’re giving them access to each other’s files if you share the same folder with multiple people. Instead, when you request files, your recipients never get a chance to see what else is in your folder.
Note: Request Files is a feature only available on business or school accounts, and only if your admin has enabled “Anyone links.” Assuming that is enabled, here’s how to request files.
- Open the OneDrive online site https://portal.office.com and make sure you’re signed in to the correct account.
- Select the folder where you want the sender to upload their files.
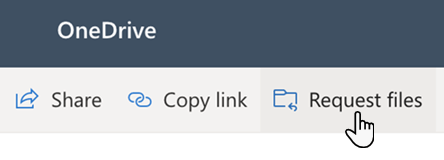
- Click Request files:

4. A dialog box will open. Under “What files are you requesting?”, just type in a description of which files you’re asking the person to provide; the recipient(s) of your request will see this message. Click Next.
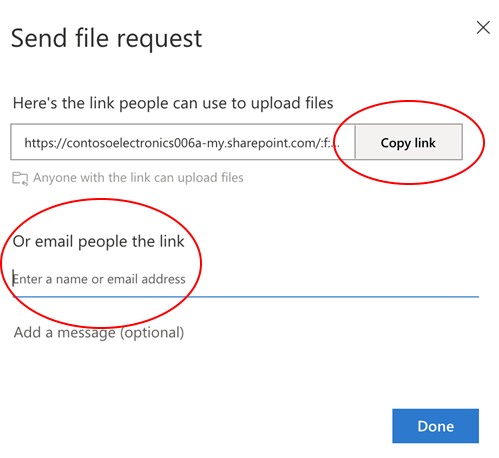
5. Now you have two choices. You can Copy link to your clipboard, and send it to whoever you like by pasting it into an email, chat window, etc.
Alternately, you can type email addresses directly into the dialog box, and OneDrive will send emails to those people for you, each with the link included.

Remember, anyone with the link can send you files. To avoid any “Send to all”-style mishaps, use the second option. That said, people who receive file requests can’t see your other files, so a mistake here isn’t catastrophic.
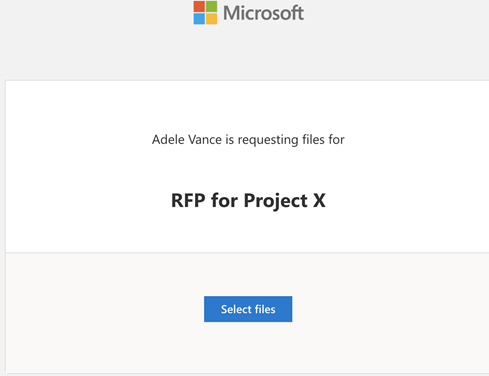
What does it look like for the recipient? Once they click on your link, they’ll see something like this:

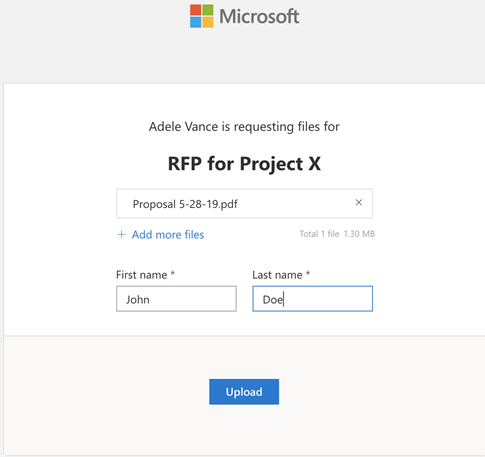
They click Select Files, and then something like this:

If your recipient are themselves signed into OneDrive, their name will be automatically filled out with their account ID. If they’re not signed in, they’ll have to enter their name. Note: this isn’t a security check; OneDrive won’t verify the name given at all. It’s there purely for your convenience, because OneDrive will tag files with each sender’s name so you know which file came from whom.
That’s it! Once the recipient has selected a file and clicked Upload, you’ll see it appear in your OneDrive folder as normal. For Microsoft’s official guide on requesting files, click here.