To install a pre-made Windows 7 image, first we have to make it. This will let us skip the lengthy update process, which can hang on fresh Windows 7 installs. This is due to the changes made in Windows Update and the size of updates required after several years.
If you have a Windows 7 image (install.wim) you can skip to step 2.
If you have access to Busix’s ISO vault, the required files are all in the \\Windows 7 Pro 64\ directory.
1. Create a Custom Image
If you do not have a custom image, you will have to make one. That requires the following:
- A fresh computer with an up-to-date Windows 7 Pro installation running, with all the core software installed.
- A second computer designated a “technician computer” that has the configuration software on it.
- A Windows 7 Disk or ISO. You should be able to find a disk, or download it from Microsoft if you have a valid licence key.
- The AIK ISO. This is available from Microsoft. Note that you get the version for the OS you want, not the one that your technician computer is running. (Get the Windows 7 version for Windows 7 installations.)
- Two USB sticks, one of which you want to commit to being Windows 7 Install Media for the foreseeable future.
- Install the AIK
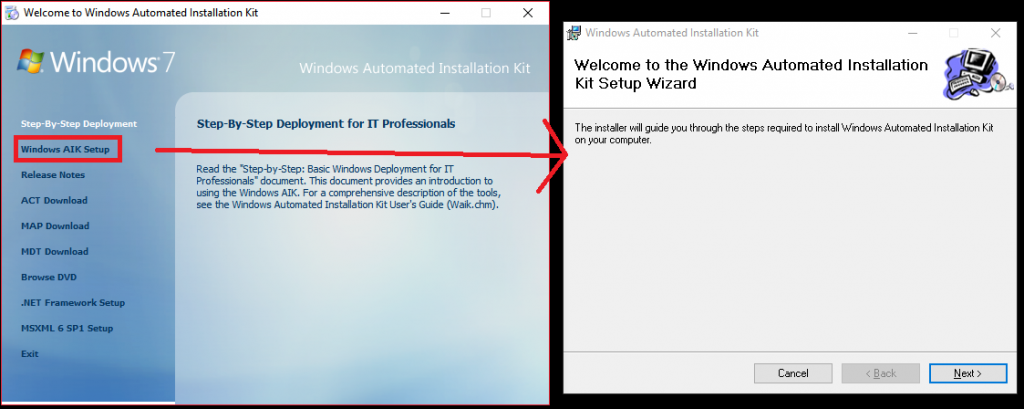
First, install the AIK. Follow the prompts, agree to the terms, and install to the default directory.
- Run SysPrep
Next, run sysprep on the reference computer. This is your clean, up-to-date install of Windows 7 Pro with whatever other programs you want to install (e.g. MalwareBytes, Office, Adobe XI, etc). Choose the “audit” mode, “generalize” and “reboot” options.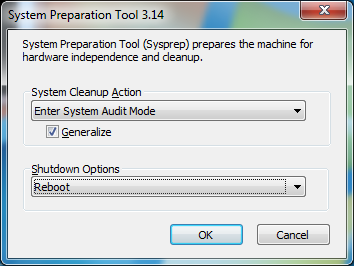
Choosing the options for sysprep 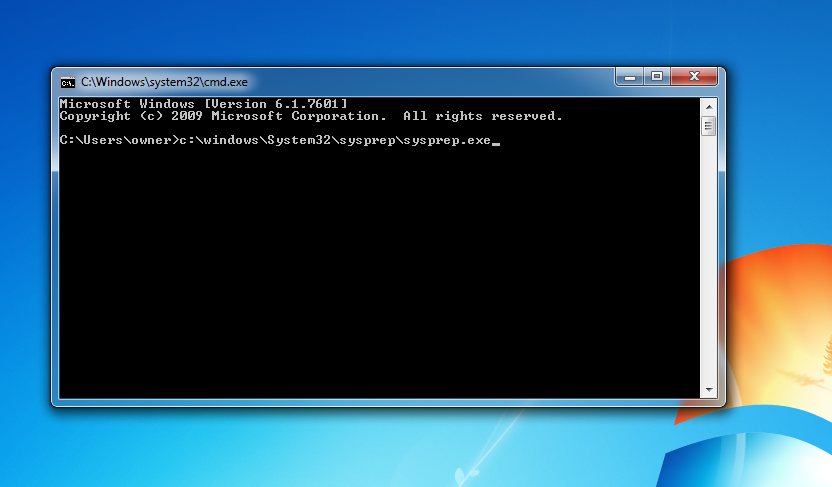
Running Sysprep on the Reference Computer
While sysprep is running, set up the temporary thumb drive that you’re going to use to get the custom image from the reference computer. Microsoft recommends a USB drive of 8GB or more.
-
Create a bootable Flash Drive with Windows PE
These steps are run on the technician computer.
You use the bootable UFD that you create in this step to start the reference computer so you can capture an image of the hard disk after you install and customize Windows 7. Windows PE does not include ImageX, so these instructions include a step for copying ImageX.exe from the Windows AIK installation folder to the Windows PE source files before you create the Windows PE ISO file.
This seems like it is needlessly complicated, but it is required because we can not copy the system files in an untouched state while the computer is running. In other words, if we don’t do this, we would make copies of an installed Windows, rather than a ready-to-install Windows.
Click Start, point to All Programs and then click Microsoft Windows AIK.
Right-click Deployment Tools Command Prompt, and then click Run as administrator.
Click Yes to open the Deployment Tools Command Prompt window with elevated permissions.
Tip You can copy and paste commands from these instructions into the Deployment Tools Command Prompt window. Doing so saves time and helps ensure that you run the command correctly.
In the Deployment Tools Command Prompt window, perform one of the following tasks, and then press ENTER:
Note that the first instruction is a command with parameters about using a 64-bit system, so it is not missing any slashes.-
type copype.cmd amd64 C:\winpe_amd64\
-
type copy C:\winpe_x86\winpe.wim C:\winpe_x86\ISO\sources\boot.wim
-
type copy C:\winpe_amd64\winpe.wim C:\winpe_amd64\ISO\sources\boot.wim
-
type copy “C:\Program Files\Windows AIK\Tools\amd64\ImageX.exe” C:\winpe_amd64\ISO\
Insert a flash drive (containing no important data) into the technician computer (the one you’re using right now). Prep the drive for booting through the DiskPart tool:
In the Command Prompt window, type diskpart, and then press ENTER.
Type list disk, and then press ENTER.
From the list of disks, identify the number of the flash drive. (Make sure the size and free space match what you expect for the UFD.)
Type select disk number, where number is the disk number of the flash drive , and then press ENTER. (eg select disk 1)
Type clean, and then press ENTER.
Type create partition primary, and then press ENTER.
Type “select partition 1”, and then press ENTER.
Note: remember the “quick” option or it will take some time.
Type “format fs=fat32 quick”, and then press ENTER.
Type active, and then press ENTER.
Type exit, and then press ENTER.
In the same Command Prompt window, type xcopy /s C:\winpe_amd64\iso\*.* E:\, where E is the thumb drive. This copies all the prepared Windows PE files onto the thumb drive.
You now have the prepared reference computer and a ready thumb drive. We’re now going to put them together to extract the customizations from Windows 7.
-
- Tidying up Reference Computer
The reference computer will auto-boot into an administrator account. Ignore the sysprep window for now, but don’t close it.
We’ll want to delete the account we had been using to install the updates and software. Go to control panel, and under User Accounts and Family Safety, click “Add or remove user accounts”. Choose “owner”, and “delete account.” Also, delete the files, and click Delete Account to confirm. You should see “Administrator” and “Guest Account”
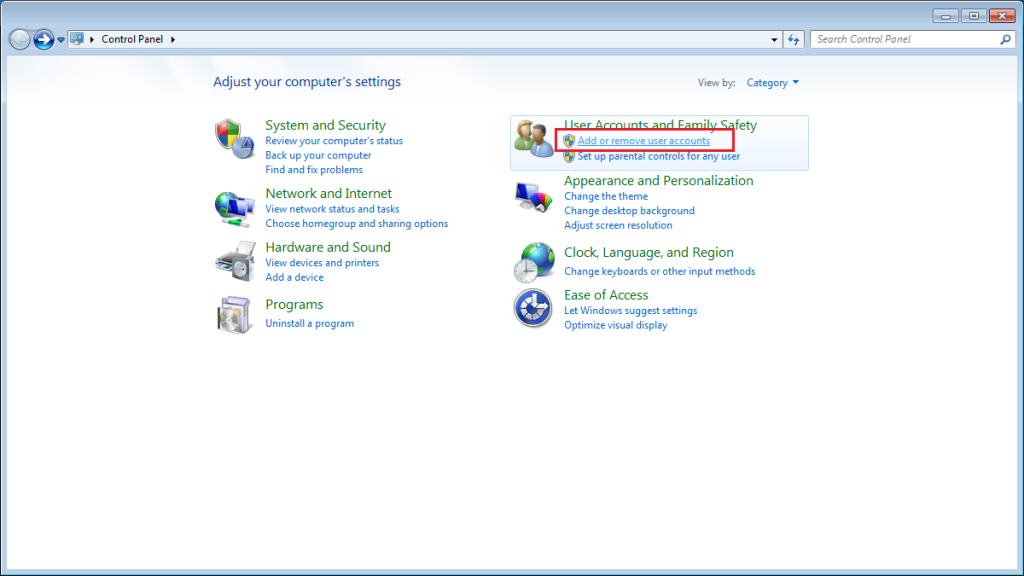
Remove the existing accounts from the Reference Computer Now back to the sysprep window. Choose “System Out of Box (OOBE), Generalize, and shut down. Have your thumb drive handy. Wait for the reference computer to shut down.
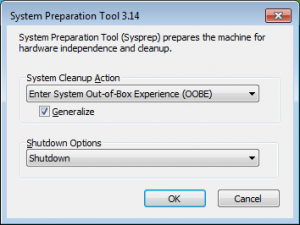
Choose an OOBE cleanup Once this is done, power down the reference computer and move to the next step, booting from the PE stick.
- Boot into PE and Create the Custom Install File
We now want to boot from the prepped thumb drive. Ensure that booting from USB is enabled. On some ASUS boards, you will have to press F8 at the splash screen to do a one-time boot from USB.
Once we get into the command prompt, we test the drive letters. First, type in “dir d:” and you should see “Windows” as the last item in the directory. This confirms that D: is where Windows is installed. This is a different drive than normal boot and that’s expected because we’re running WindowsPE right now.
Next, find the bootable USB by typing dir E:, dir F:, etc, until you find a result that has “imagex” in the results. This is the drive letter of the thumb drive.
The rest of the examples use D: as the Windows drive, and F: as the thumb drive.
Run the following command for Windows Professional. You can type this in or create a batch file if you are confident about the drive letters.
F:\imagex /compress fast /check /flags “Professional” /capture D: D:\install.wim “Windows 7 Professional” “Windows 7 Professional Custom”
This will capture the custom Windows 7 parameters, software, and updates on the hard drive of the reference computer. It will take some time. Once it is done, take a NTFS thumb drive, put it into another port, and copy the install.wim file to that thumb drive. The reason for this is due to the limitations on FAT32 – you can often only boot into FAT32, and the install.wim file will likely be larger than the 4G limit on FAT32.
Once the file is copied, you are done with the reference computer. Go back to your technician computer to complete the USB installation.
That install.wim file can be copied over any Windows 7 base install to provide a custom Windows 7 installation. The next step is to make a bootable Windows 7 stick.
2. Create a Bootable Windows 7 Thumb Drive
The easiest way to create a Windows 7 boot disk is to use the Windows 7 USB DVD Tool.
- Download the tool.
To use the USB tool, download the Windows7-USB-DVD-Download-Tool-Installer from here. Install and run the program. - The first step is to choose the Windows 7 ISO. If you have a valid licence key, you can get a copy direct from Microsoft.
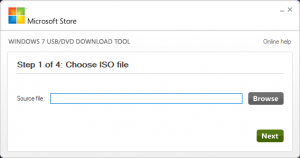
Choose next once you’ve picked the ISO.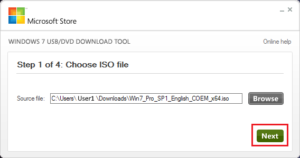
- Choose Media.
Next, use a thumb drive. CDs will obviously not work for something we want to over-write (and also with files that are more than 4.7G)
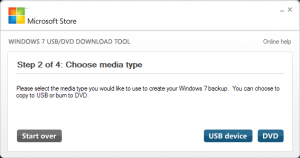
Choose which USB drive to erase, and confirm that you want to erase the flash drive.
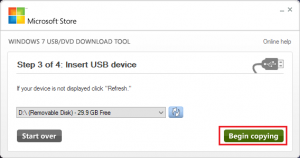
You’ll want to erase the entire disk. Make sure it’s not the thumb drive with the custom image on it.
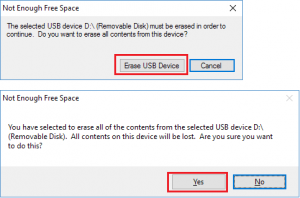
- Let the Program Run.
Once the process starts, just let it run until it is complete.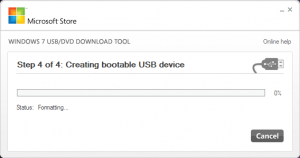
Wait for the process to finish. We now have a bootable USB version of Windows 7 and an image file (install.wim) with our custom parameters. It’s time to put them together. (You can test the basic Windows 7 boot stick if you’d like. It’s probably a good idea.)
3. Copy Media Over
Next, we can copy our custom install.wim over to the bootable thumb drive. This is just a simple file copy.
- Copy Files
Insert both sticks into the technician computer and browse to \\sources\ on the freshly made stick. That version of install.wim is going to be replaced with the customized one we made in the previous steps. Copy the custom install.wim from the reference disk onto the Windows 7 install disk. Once that copies over, any new installs of Windows 7 will have the patches and installed programs that the reference computer has.IMPORTANT NOTE: As you are copying a multi-GB file, the file will still be copying after the File Transfer dialog shows completion. Even if you’re the kind of person that never uses the “Eject” function, this is the one time when you should use it.
4. (Optional) Install USB3 drivers if required
One additional step, if you will be installing on computers with only USB3 ports (e.g. NUCs) is to include the drivers for USB3. Windows 7 does not have USB3 support out of the box. NOTE: you can run the initial installation with the USB3 keyboard and mouse, but it will not allow you to use them after the first reboot.
- Get Intel’s Tool.
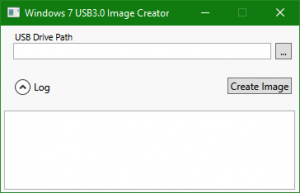
You can use Intel’s USB 3 creation tool to add the drivers to the install.wim image AFTER you have replaced it with the custom image. (Obviously, if you patch then replace, it will over-write the patched version.) Intel’s tool unpacks install.wim, then adds its files before packing it again. - Run the creation tool.
- Browse to the File
Browse to the root of the thumb drive.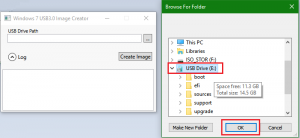
The tool will find the images, just give it the root of the boot stick. - Wait Patiently.
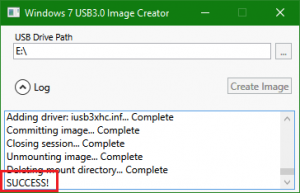
Finally, wait. It can take several minutes to patch the install disk. Note that it will say “SUCCESS!”. “Unmounting image…” is NOT complete.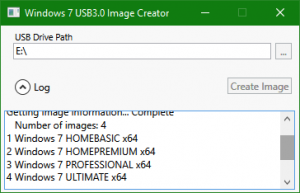
Wait until the program says “SUCCESS!“. It does not lock your machine, so you can keep using it.
4. Boot and Install Windows 7
Finally, boot and install Windows 7 as usual. This time you can skip the exceedingly-long patching that first-install Windows 7 machines have to go through.
